Friday, September 15, 2017

A quick fall craft

A 5 minute pumpkin!  

The supplies!  I used 2 pieces of cardstock (and have quite a bit left for my scrap basket), a tape runner, foam squares, oval cutting guide for the Custom Cutting System (Creative Memories), Soft Suede ink pad (Stampin' Up!), wire works (Stampin' Up!) and a small brown scrap of cardstock.

This is the Custom Cutting System with the Oval guides and the 3 different cutting blades (they give you different size cuts in graduating size of 1/4 inch.)

Directions: Using the largest oval (for the largest size pumpkin) and the blue blade cut 3 ovals from the outside of the guide.  Over lap two of the ovals slightly and on third oval adhere foam squares to pop the center of the pumpkin.  Ink your edges (I use a sponge or the finger dauber to do this) before adhering the center oval on top.  From your brown scrap of cardstock cut a "stem" piece and adhere just behind the center oval.  With the wire works (26-gauge wire) I cut a length (eye-balled) approximately 8-10 inches and wrapped both ends around a pencil then folded in half and secured with a foam dot behind the center oval.  I did this for both sides of the stem.

I might add leaves but for now I'm very happy with this little 5 minute craft.  I do plan to make more in varying sizes but needed to get a few things done for now.

I hope you enjoyed this little craft project and look forward to your comments and suggestions.

Thanks 
Maraline

Thursday, September 14, 2017

A little "Magic"


What a fun layout to make!  Using the Creative Memories Gems cutting system it was quite easy and the perfect title page for our Disney album.  The papers come from the Say Cheese collection, I believe I ordered them through Scrapbook.com but at the moment not totally sure as I got them a while ago.  I do love how the flower seems to pop off the black background.

When we travel to Disney World; we color coordinate our shirts to make it easier to keep track of each other and have a different color for each day.  Probably the only time we are color coordinated in photos...lol.  The difficult part of the matching shirts is trying to get them in styles that we all like, and when some of our family members that live in different states join us.  Also we have found that we need not only short sleeve tees but also long sleeve in case of a slightly cooler day.

This is using a project recipe (Bookworm) from Creative Memories, using the Say Cheese paper collection and the filmstrip border maker cartridge from Creative Memories. I love how it gave me the chance to use 9 photos and still have a clean look.

The Project Recipes are so versatile and always great looking whether you use the paper collection they were designed for or other papers.  I'll be sharing a beach album I've been working on with my granddaughter soon that we used the Cool Serenity Project Recipe.  I'll also show how to change sizes from 12 x 12 to 8x8 pages.

Until next time Happy Scrapping,
Maraline


Wednesday, September 13, 2017

REvamp......Starting over

After a  very long hiatus and fall almost upon us I'm back!

I want to share my love of crafts, cooking, connecting with people and love of family.  Grab a cuppa and get to it.

About a year ago, I began selling Creative Memories, mainly for and to myself because I love their products.  The papers and albums are top notch quality; but honestly the tools are my absolute favorite!

Creative Memories did go through a period of closing a few years back and then was bought by Caleb Hayhoe and it is back!  The products are kept fresh and of great quality. Believe me you will love the products and tools!

Talking about the products and tools from Creative Memories I wanted to share a layout I made a couple days ago.  It uses the new paper pack Toil & Trouble, black cardstock, goldenrod cardstock, the new Victorian stand alone border punch, Leaf Trio Punch, and the new Pumpkins Border Maker cartridge along with an original (yellow) Sizzix die - Ghosts


I don't usually pre-make my pages; but knew I wanted to use the Victorian Fence border punch for a Halloween page and will be filling it with photos shortly after Halloween.  The Layout is based on a Project Recipe (Sketch) from Creative Memories (Countryside Comfort - another new paper collection this month).

I will be posting more tomorrow evening, so please come on back and join me!


Maraline

Sunday, August 24, 2014

Wow, Time just flies!

It seems only a couple weeks ago I posted and yet it was more like two months ago!

What has been going on?  Well Jaiden finished up Kindergarden and has played all summer long with her friends.  Her dance recital was held the week before school finished, which brought a week of practices every night and definitely wore her out.

We made a couple trips to Hershey Park this summer, and spent a few days at the community pool.  Although the summer has really been a mild one and leaves me to wonder what winter will be like?  I don't mind snow, but hate the bitter cold we had last winter.

Bill and I got to go on a vacation; just the two of us!  Something that rarely ever happens and it was nice!  We spent two nights in Orlando and didn't quite get to spend time at Universal Studios as we had talked about (luckily we didn't have tickets already) but we got to spend time with each other which is the best!.  From there we drove to Palm Beach and boarded a Royal Bahamas (Bahamas Celebration) cruise ship for an overnight cruise to Freeport, Bahamas and spent two nights at the Wyndham Fortuna Beach Resort and then returned to Palm Beach via the cruise ship.  We ended our trip with a one night stay at a lovely B&B in Lake Worth, FL and had dinner with our daughter and her boyfriend.

The cruise was really wonderful; lots to do and we really didn't do anything but explore the ship on the way to Freeport but still enjoyed it.  The cruise back to Palm Beach we played Bingo, watch a comedian, balancing act, and magic show.  Listened to a little bit of karaoke and walked on deck looking at the stars.  The food was great!
Let me just say....Don't go to the Bahamas in August!  Even the locals told us that it normally isn't that hot but wow it was this year!  The humidity on top of the heat was too much for me.  I think we spent as much time in our room under the AC as we did on the beach....lol.

But with all good things there has to be an end, so we arrived back home to 67 degrees and rain.  And good news followed up for me the next day when I stepped on the scales.  Normally not something I enjoy doing at all, but from the morning we left on our week's vacation til we got home with all you can eat buffets both on the ship and at the resort I only gained 4 ounces!   Of course it would have been better to have lost weight but hey not putting on pounds is okay too.  I really think I melted it off during the heat and humidity, but I'm not going to complain about how.....LOL.
I still have to download the photos (which I didn't take that many really.....well not for me) and will post a few of the gorgeous view on the beach when I do.

Jaiden is set to start first grade in about 1.5 weeks and is all ready with school supplies and new school clothes so a first day of school photo will also soon be posted. Along with a few crafting photos which I haven't downloaded those photos either.  I guess I need to get busy and start setting aside a certain time frame to down load photos and be prepared.

Till next time!

Saturday, July 19, 2014

Another Waterfall Folio...and a gift flip album; my they are addicting!

Yesterday and early this morning I completed another Waterfall Folio and love it!

It just seem to be screaming at me to use with the new paper pad I got at JoAnns (DCWV Dear Jane).  I love Jane Austen and this paper pad is just perfect!

Closed                             Opened


Some of the pages of the waterfall.  Light pinks and cream and then the brown with portraits of Mr. Darcy, Mr. Bingley, Elizabeth and Jane Bennet.  Just takes me back to reading "Pride and Prejudice".

Maybe I should watch one of the versions today; while sipping a nice cup of hot tea in a china teacup.....dreaming of days gone by!

Oh wait as reality sets in.....there is much cleaning and stuff to do.  I guess the movie watching will have to wait til tonight.


I didn't remind idle since my last post until now though.  I made a flip album for a co-worker/friend of one of my sons for her birthday.  She doesn't like cut flowers so he wanted to get her something she would like and be able to use.  Mom to the rescue....lol

With her little boy in mind I came up with this:

Just a few different patterns using blues and light green.  Leaving most of the embellishing for her once she puts in photos.


 Here are a few die cuts I have included for her to use.


Thursday, July 17, 2014

My third kind of album

Which really is my 5th album in the last month...lol.

This one is a called a Waterfall Folio.  Many possible uses for it, but I'll let you decide what you think it is best suited for.

A sleek 4 inches wide and 8.5 inches long and only 3/4 inch wide; "how much could it hold?" you ask.  Quite a bit really
A pocket and the right side holds the waterfall effect of places to put your little pictures or quotes or souvenirs.
A look of some of the pages of the waterfall


Isn't this a neat little album.  This again is a design I got from http://mysistersscrapper.com/2014/07/graphic-45-waterfall-folio-tutorial/  I think this is one of my new websites.....lol.

I will post again soon with some of the swaps I've been working on but really like for the people to receive them before I reveal.  So that won't be for about a week as they are all being mailed today.
Until next time....have a Happy and Safe week.

Second mini album...and third

This little album is almost like a thick card, and I wish I could give you a website to go to but I printed the directions off quite sometime ago and can no longer find the site to give proper credit.

I do believe this is the quickest and easiest album ever!

It is called a Flip Album
 Just showing some of the folds

Fully opened

How thin it is folded up.

Wouldn't this be a great little gift for teachers, maybe an anniversary or even for baby shower or weddings!


Of course one led to two:


I think this one will be a little souvenir of a tropical vacation I have planned.


My how time flies

It has been so long since I've posted and yet it seems like it was such a short time ago.  It is hard to believe that we are already half way through July!  Where has time gone?

There have been several changes here on the home front and it possibly means I will have more time for playing in my craftroom....but maybe I shouldn't speak to soon on that front....lol.

I have been bitten by the mini album bug it seems!  Last month for a swap in OurCreativeTable kicked it off.  I made my first from the cover and everything mini album.


Every page having either a flip page and a pocket sliding page.  It was a lot of fun and kicked off new found skills.  Of course Jaiden asked me to make her a "Pinkalicious" album; which also includes green and purple in the mix.  It is still a work in progress.  This one though I did add a few minimal embellishments since it was for someone else (and didn't get photos of the few additions).  Directions for this can be found at http://mysistersscrapper.com/2013/07/pocket-page-mini-album-tutorial-series-part-1/  The entire directions are in 5 parts; click on the links below each part. 

As with all addictions this one has lead to two of this type album, two of another album and a third design.  I'll share those in different posts to not overwhelm with too many photos at once.

Hope you enjoy!

Tuesday, March 18, 2014

Springtime?

I get the feeling that Mother Nature isn't gettng on board with the whole Spring is coming sentiment.

Yesterday (St. Patrick's Day; which usually brings Springtime to my mind at least) brought 6 inches of snow and sore muscles from shoveling...definitely not my idea of spring starting.  It definitely has been a cold and long winter this year.

I'm sure it wil arrive one day soon!  
On a much sweeter note:  Yesterday morning Jaiden decided to make a Leprechaun trap with the two hour delay for school.  It was quickly done and all hers.

Monday, March 10, 2014

Spring Cleaning has arrived!

I've dabbled for the past week on getting this going but today is the day to really get going on this.  I will be begin with my kitchen and craftroom...taking a full week to get my kitchen done and allowing the craftroom more of a good straightening today.  I know I won't get it all done in two weeks time but at least a good start for the month.
Yes as crazy as it may sound I'm putting a time limit to get it done in....deadlines tend to help me out....lol.  Nothing like putting pressure on ourselves.
I'm trying to get back on track with Flylady by using the weekly zone plus adding extras each day; hence the kitchen taking a week....second week of the month is the .....you guessed it Kitchen!
I feel by doing it this way when the rooms next roll around for the zone of the week I will have a headstart with doing some of the overlooked areas of it.....at least it sounds good early in the morning to my mind.....LOL.
I still have a few things to get done on my swaps for the month and really need to get busy with scrapping LOs for the amusement park album before adding more pictures to get to for this subject...not to mention a dance recital and birthday party coming up for my favorite subject....Jaiden.
So for now I leave to go get busy....perhaps later I will post pics of my progress in the adventure of Spring Cleaning!

Monday, March 3, 2014

January Swaps and Ornament

Boy it feels good to be getting caught up....sorry for the backpeddaling.
First for my tag:  Love was the theme; Je t'aime Paris!
Next was the Heart Shaped Card:  This was my first easel card to make but I like the way it turned out. (Please excuse the mess in the background; when creating I have things all over....lol)


ATCs: Valentine's themed


The Bride's Tree Ornament was January was a heart symbolizing True Love.
I'm making my ornaments about 4 inches tall so if I decide to give them to a young couple they will fit on a smaller tree but won't be totally lost on a larger tree either.  I'm leaving the backside blank so a photo of the couple could be added if they would like.

March Swaps and ornament will have to be completed before adding them so this will be the last post today....lol.

Hopefully Spring is on it's way and we can all begin to thaw out.

More updates on creative play

Although not quite as soon as I'd planned; here are some more photos of playtimes
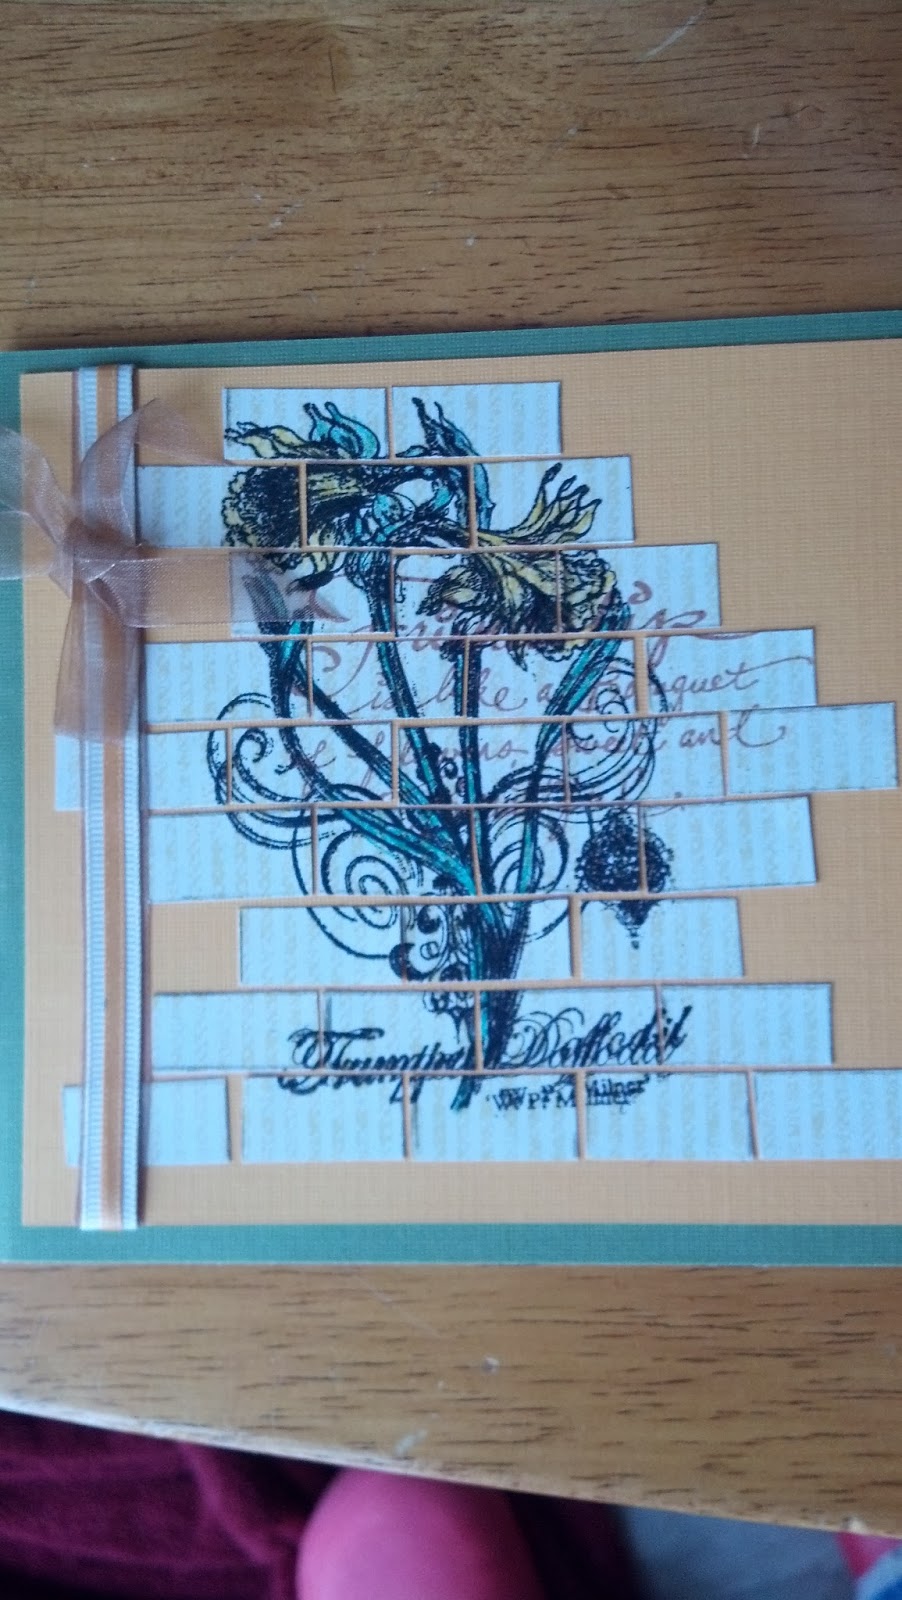
First working with a new to me technique for a swap:  Technique is the "brick wall" technique from the www.splitcoaststampers.com site (I really love this site!)
As a trial I made a card with it. I like the way it turned out, but thought it needed a little something more.

 So for a swap with this technique was time to make the tag:  The first stamp used was a little too much for my tag so I used a set of Stampin' UP! stamps (tulips).  This time I inked the edges of all the "bricks" and love it!
 Next was time to make a card for a swap: The theme was Green and Spring (I know I am so ready for Spring like most everyone)  I cut the thistle from a Cricut Cartridge (Art Nouveau).  Thistles are dear to me filling me with fond memories of the 4 years we spent in Scotland.
ATC Swap: Pastels were the theme!  I went through many different ideas before coming up with this simple but sweet card.
Next is the ornament for the Bride's Tree Ornaments: This is a series of 12 ornaments with a symbol of something specific.  A custom in Germany is to give a set of the ornaments to a Bride for their first Christmas. 
The Teapot is a symbol for hospitality

More photos will follow soon of swaps from January and the ones I'm working on now for March.

Prayers for everyone to be safe, warm and healthy!